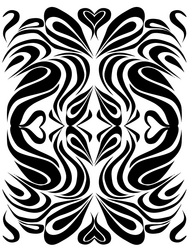
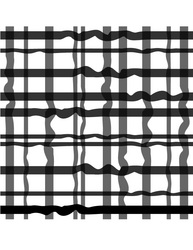
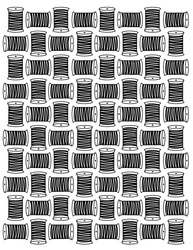
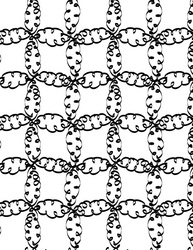
Vote for my design on the Spoonflower contest this week!
Picture
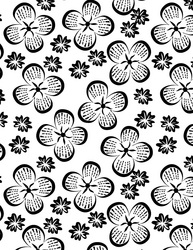
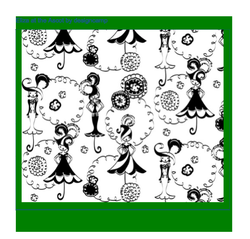
Goodness, there are 27 pages of designs in the black and white contest this week and some really terrific ideas. But I am happy to say that I am glad that I entered -- I challenged myself to draw my entry by hand and to use a theme that was personal -- not winning criteria but good for me to do things differently. My design is called Eliza at the Ascot, and is inspired by that wonderful scene in the film version of My Fair Lady with the fab black and white outfits designed by the late great Cecil Beaton. Timely I might add with a Royal wedding and all! You may find one you like better, but you can vote for more than one, so think about voting for my design, Eliza at the Ascot, and have fun looking. I did!
P.S. Patty Sionger, the winner of project selvage was announced today too! I voted for her collection, Backyard Baby. I thought she did a great job of coming up with a clever collection with a great variety. I can totally picture the quilt I'd make with it. Congrats Patty!
 
I am taking a silk screen class for yardage over at Modern Domestic and I have to decide what design to print next week. It has been so much fun learning about how to do this (finally!) from textile designer Susanna Scott, who worked for Jonathan Alder and interned for Hable Construction. Yesterday we prepped our screens and she gave us a demo on exposing them. I, of course, epically failed at my first try with the emulsion, but Susanna is so sweet and told me I did it perfectly. Practice makes permanent they say. Which design should I go for?
 
Picture
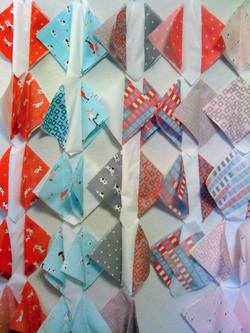
Started a new project and loved how it looked hanging up on my felt wall so I had to share. I am challenging myself to use a Moda Charm pack and then submit the design to the Moda Bake Shop. This was fun to design but to be honest, it takes more planning than I originally thought it would. That is okay though, I am enjoying the process and I am working on my tutorial style.
The fabric I bought for this is called Sherbet Pips. It is so darling - little dogs playing and kids on swings. The name of my project is 'Cat's Game' and I can't wait to show you why. Enjoy the Weekend!
 
Picture
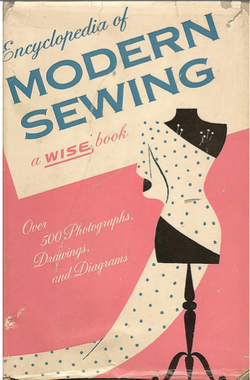
I have a middle school sewing class starting again this week and I always like to start off with a little discussion about body measurements. While it is so important to work with accurate measurements when you sew, this can be a really sensitive topic with tween girls. I put a  handout together a few years ago for camp and it always makes for a great ice breaker with the girls. Basically, I show how measurements for home sewing patterns were originally done by age: a size 8 was for an eight year old child, a size 16 for a sixteen year old. Today this is not the case, plus we have S,M,L,XL and other creative sizing methods. I always tell the kids that their measurements are their perfect measurements and that the ones on the patterns they buy are only to be used as a starting point.

After we talk about measurements and review how to read a tape measure I have the girls partner up and fill out a measurement chart. Then we date them and I remind them that when they grow and their measurements change so they will need to make sure to remember how to do the exercise!

I thought I'd post the handout for fun today and also in honor of one of my mentors, the late Betty Williams who's sewing pattern archive I spent years playing with and organizing.
dcmeasurements.pdf
File Size: 3941 kb
File Type: pdf
Download File

And a few days ago my friend Miyong posted an article from the NY Times about the history of sizing. Read the article, 'One Size Fits Nobody: Seeking a Steady 4 or a 10' by Stephanie Clifford here.
 
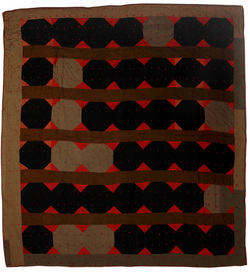
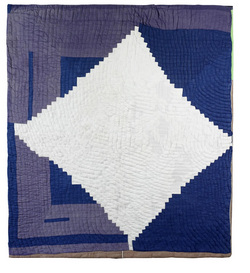
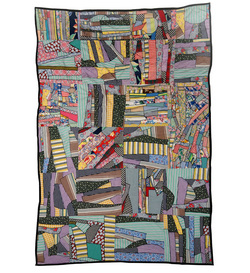
Sometimes you come across inspiration in the most random ways, and as I was searching for vintage bowtie quilts for a post on, well, vintage bow tie quilts, I happened upon this photo of a quilt that looked like bowling balls and it was on the website of a dear friend Frank Maresca over at Ricco Maresca Gallery. These quilts are from a collection of African-American Textiles and they are just divine! Take some time and look at the slide show on their website. It is worth it!
Picture
Picture
Picture
 
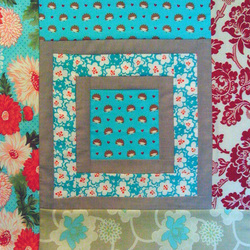
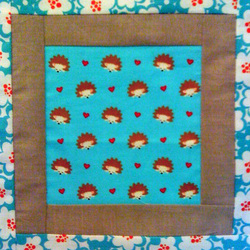
Thursday at the PMQG meeting Susan Beal gave a terrific presentation on the history of the Log Cabin Quilt and spoke about her most recent book Modern Log Cabin Quilting. At the end she gave away a few copies of her books and other goodies and she picked my name for one of her Modern Log Cabin Quilting books! If there is such a thing as wish power, then it worked for me: I was thinking, "pick me, pick me, pick me" as she reached into the hat...
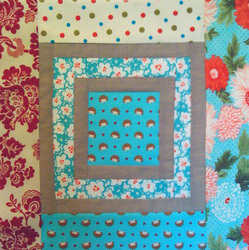
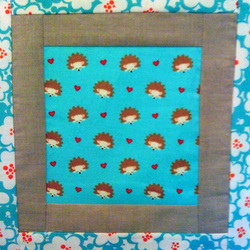
Well this morning I decided to 'quilt-it-forward' and instead of just giving my quilt scraps away I made two blocks inspired by her book and her presentation. One block is done in the traditional Log Cabin Style and the other is done as Court House Steps. Do you know which is which? Well, I will draw a name at random next Friday for anyone who posts the correct answer and I will give-away something else! I'm keeping that a secret thought, you'll just have to stay tuned to find out!

Block A

Block B

And, I am giving these blocks to Doni and Kimberly, the winners of the name contest because I thought, wouldn't it be fun if they made something out of them and I could post that on the blog? So, Kimberly and Doni - are you up for the challenge? I hope so!
 
It was not easy to chose a name, but when two of my brilliant friends came up with the same name Stepping Stones it seemed like a sign. So both Kimberly and Doni win! I didn't get those ten comments, but you two get a prize anyway. I have put together the scraps from this project for you to make something lovely with. And I posted more pics of the quilt on flickr. Thanks to all of you who commented and for all your kind compliments. I am working on a new quilt pattern called Cat's Game (as in a tied game of Tic Tac Toe) and I hope to show that off soon.

Name this quilt!

4/20/2011

 
Almost done! I'm taking a break from putting the binding on to do a post. I was thinking about letting YOU name my quilt. If I get at least ten comments with name ideas I will pick one and the winner will get a special prize. This quilt will be donated to the Juvenile Diabetes Research Foundation (JDRF) Hope Gala Auction which is on April 30th. It is part of a silent auction Baby Basket and the name will be printed in the program. This is a black tie event, really very lovely, and it raises alot of money to fund research for a cure for Type 1 diabetes.
So, a name: think young, think bow ties, think fun! Post your comments! I'm bringing this in on Friday, so we have until then to come up with a name. Hint: I've been playing around with calling it Farfalle something, after my favorite "bow tie" pasta...
 
I hope I get to pick up my Bow Tie quilt from Pat's Just Quilting tomorrow! If I do it will be just in time to bring to show and tell at the Portland Modern Quilt Guild meeting! Meanwhile I thought I'd do a tutorial for how to make these nifty little blocks, so here we go!
Picture
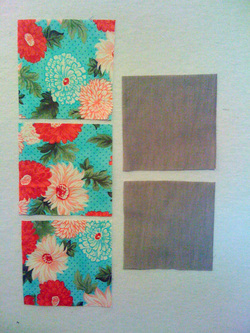
To begin cut three 5" x 5" squares of a print and two 5" x 5" squares of a solid. Charm squares are perfect for this, but you can vary the size to your liking. There are endless variations, just make them all the same size.
Picture
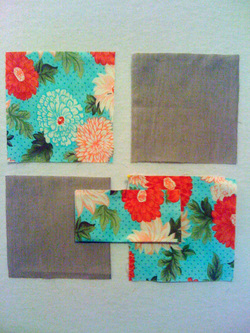
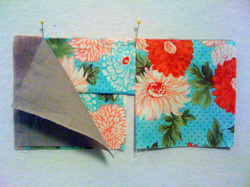
Fold one of the printed squares in half. You are going to make a little sandwich with a solid square, the folded print square and another of the print squares. Ready?
Picture
What a lovely little sandwich! Make sure you have the fabrics facing these directions: bottom print square - right side up, middle folded square - edges lined up at the top, solid top square sandwiches in the folded square. Now you are ready to sew them together. You will be sewing along the left side of the square in this photo (In reality you will flip the sandwich over so your seam allowance is facing the right direction!)
Picture
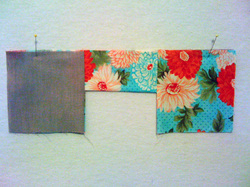
There you go, step one is complete! Next open it up and press the seam allowances: I pressed them toward the printed square in this photo and then flipped the solid square over to the same side and pressed it again. Ready to make your second sandwich?
Picture
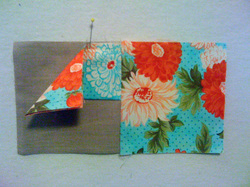
Here we go! Lay the third printed square right side up, sandwich the folded square in between with the solid square on top. Again the stitch line is shown down the left side of this photo, but you will be flipping it over and sewing with the seam allowance toward the neck of your machine. Press the seam allowance away from the folded square like you did the first time.
Picture
Here is what it will look like when you get to this point.
Picture
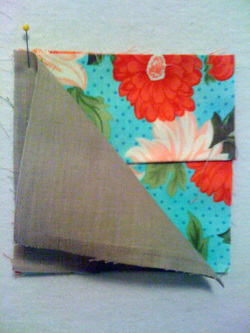
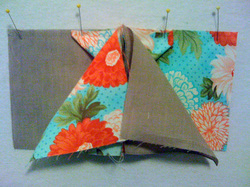
I promise this looks more complicated than it is, and it is fun to boot! Open out the sandwich on the left so a printed square and a solid square a laying flat, right sides facing up. The center printed square will fold and look like a triangle with folded corners at the top edge. Then open up the sandwich on the top and pin them together along the top edge.
Picture
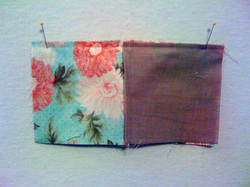
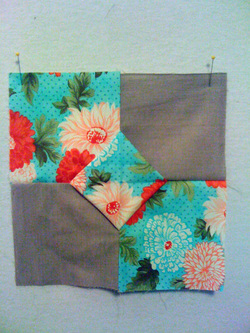
When you sew it it will look like this. And now for the finale. Open it up and voila your bow tie is complete! Every time I do this I feel like shouting hurrah! It is just such a clever little block, I can't get enough of it.
Picture
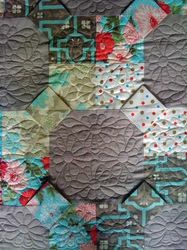
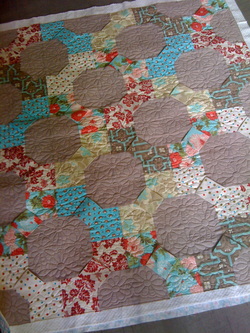
The centers are dimensional, which makes for a great quilting challenge. We decided to do a motif in the hexagon areas and avoid the center of the bows. I can't wait to see the finished piece!
Picture
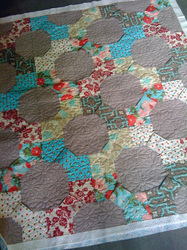
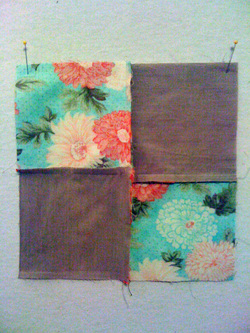
P.S. Here is what the back looks like with the seam allowances pressed. Let me know if you have any questions or get stuck. I promise you will want to make fifty of these once you make one: I know, I did! Here is the quilt top with all the blocks assembled:
Picture
I have also uploaded a layout and cutting guide pdf file here. The finished quilt is going to be donated to the JDRF Hope Gala Auction.
 
It is hard to believe it has been two months since the last Portland Modern Quilt Guild meeting! Since February I have made three quilts and I am in the middle of a 4th. That is something! I guess I can officially say I am a quilter now - yay!
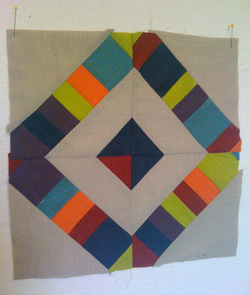
So the swap this month is a solid 12 1/2" block. I had some leftover shot cotton scraps from the Diversity quilt I made for the da Vinci Arts Middle School Auction so I thought I'd use those up. Some of the pieces were really small, but using a paper piecing technique for string quilting I was able to use them up. Here is the result:
Picture
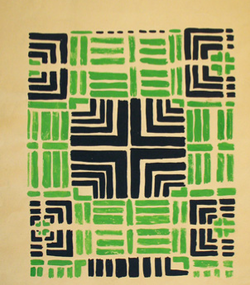
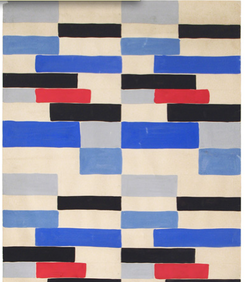
As I was sewing this together I couldn't help but think of the amazing Sonia Delaunay exhibit I saw at the Cooper Hewitt Museum in NYC when I was there in March. I have been obsessed with her art since I was a student at Parsons, but I had never seen it in person! I was in heaven! There is a great slide show on the web that features many of the pieces that were in the show and the book they published is sure to be the definitive volume of her work. Here are some of her modern textile designs from the early 1930s:
Picture
Picture