Hard to believe it is September! It was even harder to believe that camp is over for the summer and I don't get to hang out with the most creative kids in the universe on a daily basis for another 10 months. Well, never fear, I have PLANS!!! I met with the owners of SewPo last week, a swell little sewing studio in NE just off Mississsippi Ave that has space for classes and lots of nifty products in their retail shop and they want me to teach! This is where you come in - what classes do you want to take? I have a list proposed to them, but I'd love to cater my classes to my campers.
Picture
I am in the process of uploading all the photos from camp onto the design camp flickr page. It is taking a while, so check in for an announcement about that.

These days I'm keeping super busy with my day job. I am designing all the artwork for the girls apparel for Fred Meyer which I do twice a year. My design with my dog Ryder that I designed last summer is in stores now. He is such a ham!  Too bad it doesn't come in my size!
And I am also in the process of finishing a quilt that will be published in Fat Quarterly this fall, a quilt for my sister's wedding, blocks for my flickr swaps Nubee and the 3x6 Sampler Quilt Mini Bee, and wouldn't you know I woke up this morning with a new idea for a quilt!

Picture
And last but not least, here is a quilt I finished this summer called 'Off The Wall.' I am going to post a tutorial over at the Cool Cottons blog one of these days! It was raffled off to raise money for the drama program at daVinci Arts Middle School. Which brings me to my last mention - I will be teaching a fashion illustration class and my 'one week boutique' workshop there this fall! Excited about all the great projects on my plate right now!

Log Cabin Love

7/19/2011

 
This past weekend I treated myself to a birthday present and signed up for Susan Beal's Modern Log Cabin two-day quilting class at PNCA. What a treat it was!

Saturday I cut out all the parts for a quilt I am making for a wedding present for my sister. The design is based on Susan's Anniversary Quilt from her book, Modern Log Cabin Quilting. Susan gave me some sound advice about sewing the logs in a clock-wise direction and it changed my world! I was so inspired that evening I cut out strips after class so I could make sunshine and shadow blocks and experiment with layout varieties in class the next day.
I couldn't wait to start sewing the blocks together Sunday but right away I learned it was much more challenging than I expected. It took an incredible amount of focus and concentration but I powered through it and made my blocks. Then this amazing thing happened: I put my blocks on the design wall and Susan politely asked if she might "show my something". She arranged them into the 'sunshine and shadow' layout and them changed them around to make a 'streak of lightening.' I think at that moment I was actually hit by a bolt of lightening! She showed me a few books she had with other layout variations: the possibilities are endless!

This is the kind of quilting experience that really drives me to learn more. When I made these log cabin blocks I felt that I was part of something that linked my modern day present with the past history of American women. I am so glad I got to take this class with Susan and the other creative and talented women participated.

Susan has a video tutorial on her Modern Log Cabin blog for how to make a basic log cabin block. Click here to watch. She is also teaching a pillow class over at the Pendleton Woolen Mills store on August 20th. Treat yourself to an afternoon with Susan and you will be happy you did!
 
Picture
     This is what happens when I email my friend Tanya (she lives in Santiago, Chile) and say, "are you ready for my next design challenge?" I wanted to design a skirt to enter in the Spoonflower 1 yard skirt contest and I knew Tanya was the perfect person to brain storm ideas with. We have collaborated lots of times as Modern Spool.
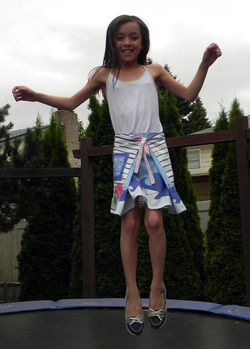
     The Ahoy! skirt took about a month to get right; Tanya's role was to act as my design director, advising on construction and challenging me to come up with the best possible design and illustrations. I jumped for joy today when I finished the skirt and got to see it on one of my talented Design Camp students, Maggie S.! To celebrate, I've put a photo tutorial together to follow along with the printed pattern instructions. The contest officially launches next Tuesday, but I just couldn't wait to show it to everyone. Enjoy!
Picture
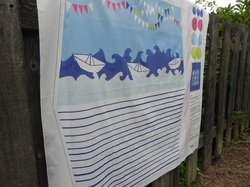
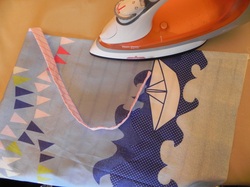
The Ahoy! Skirt comes as a one yard panel and is available on Spoonflower. You will want to buy the quilting weight cotton for this project.
Picture
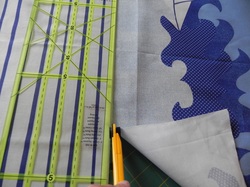
Before you cut out all the pieces, measure the hips of the child who you are making this skirt for and mark a line in the seam allowance. The Ahoy! skirt needs to slip easily over the hips in order to get it on. There is a hip measurement guide at the top of the skirt pattern. Note that the actual measurement is only half of this amount (such as 10" for 20") That is okay - your skirt is made using two pieces, so it will fit perfectly! This skirt is designed to fit girls' sizes 4-7.
Picture
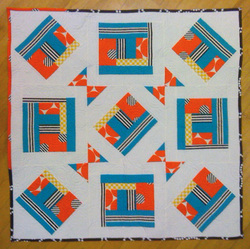
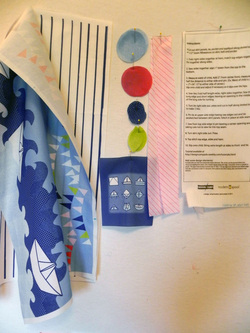
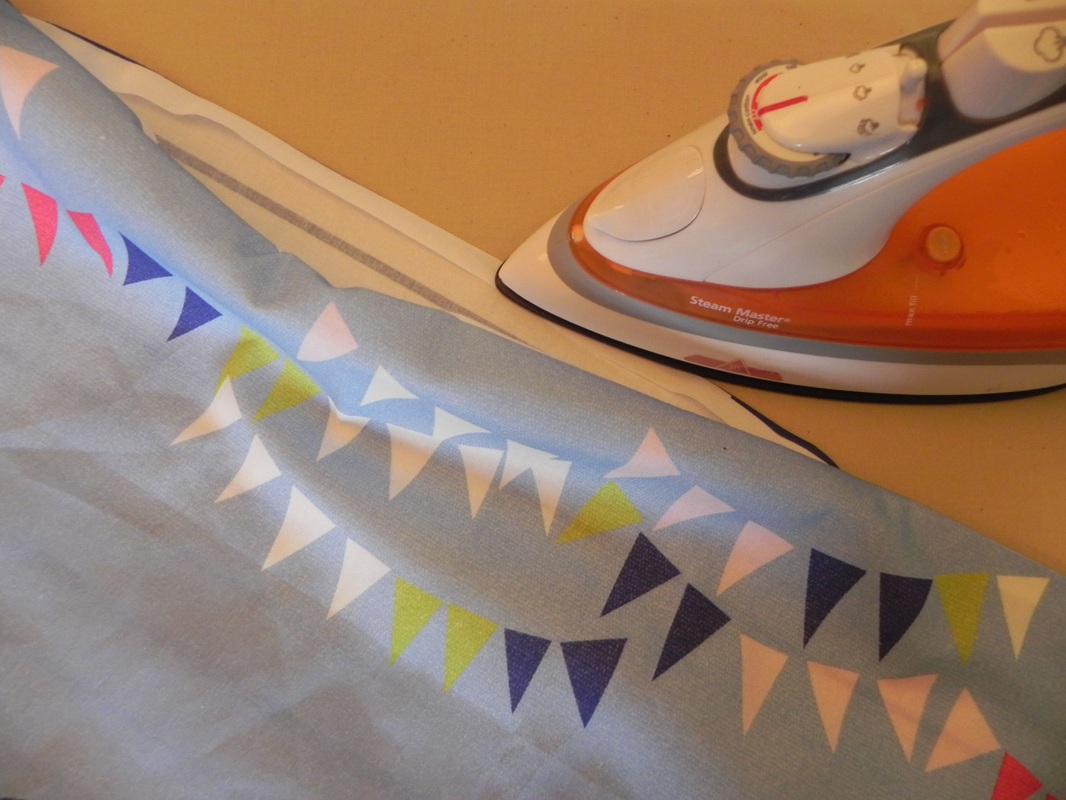
Now cut out all the pieces. I used a rotary cutter on my cutting board, but shears will do the trick just fine. The skirt and ties have dashed lines to follow; cut out the optional pocket and circle appliques along the edge of the color. I also cut out and hung the instructions up near my cutting board, which came in handy.
Picture
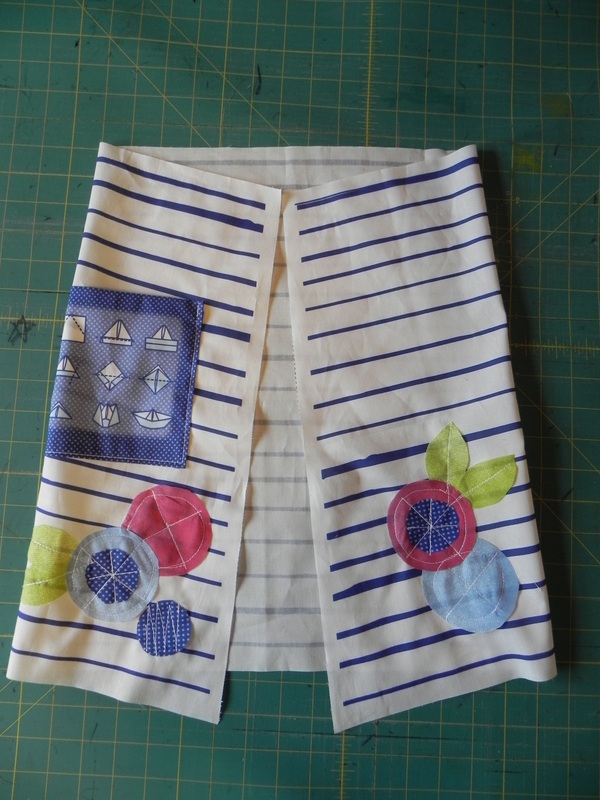
Here are all the pieces on my design wall. Let's add the pocket and some appliques! You don't have to, but it makes the skirt awful cute, just sayin'...
Picture
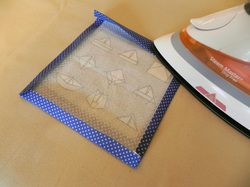
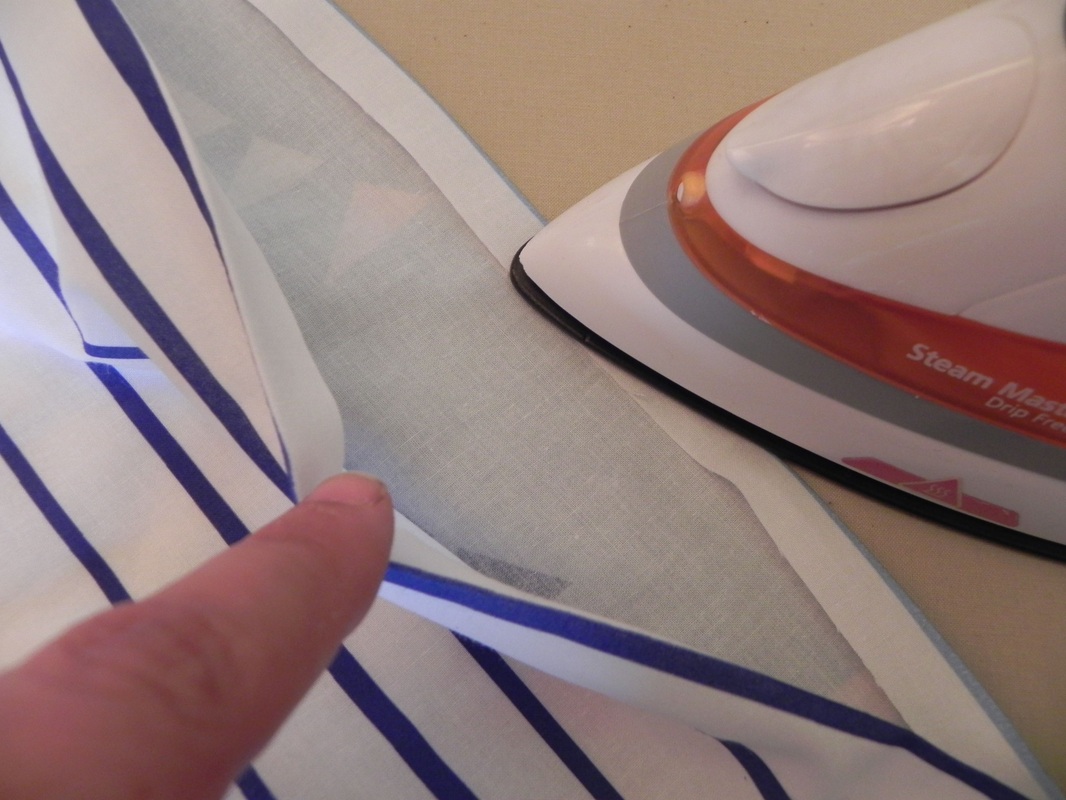
Press the pocket 1/4" on the sides and the bottom edge. Press the top edge 1/4" and then turn it another 1/2" and press again. Topstitch that top edge of the pocket.
Picture
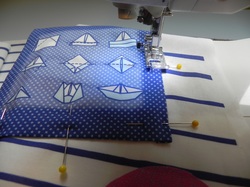
Layout all your design elements on the striped skirt piece. I folded the sides into the center so I could make my design decisions. I also sandwiched my wide quilt ruler between the folded piece and the back of the skirt so I wouldn't pin the two layers together. I wanted all my design elements on the front of the skirt, but they can go anywhere! Just don't get too close to the edges or the hem.
Picture
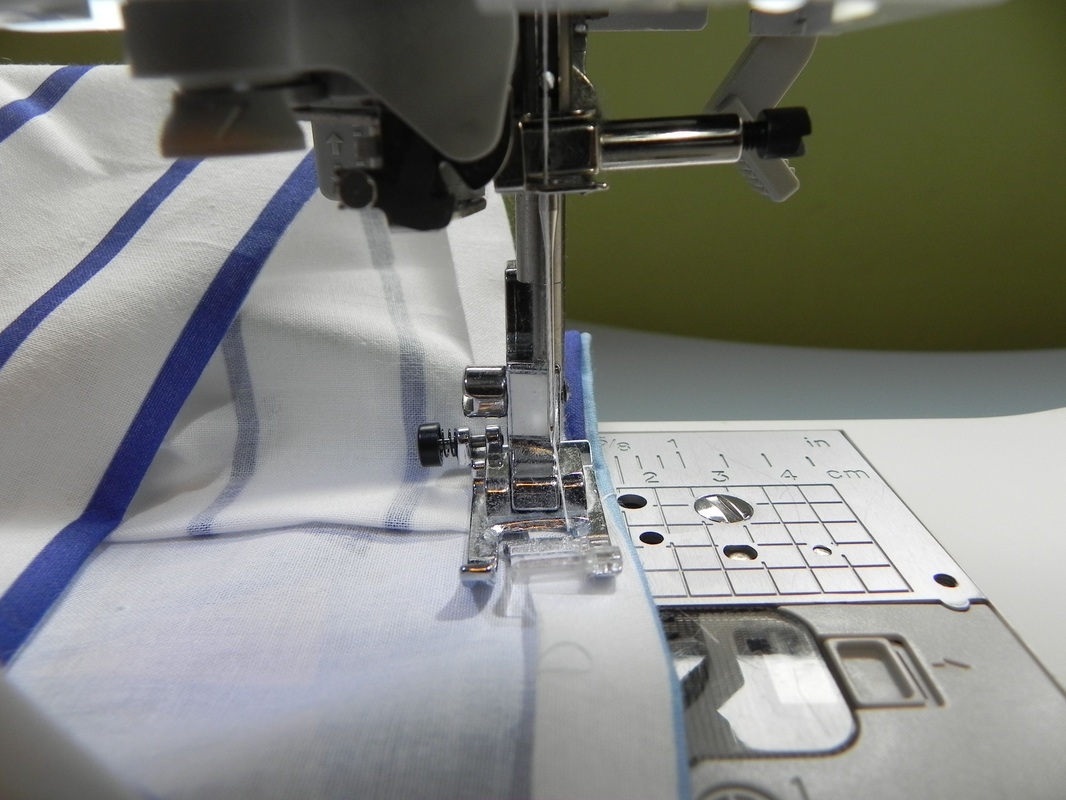
Sew around the three sides of the pocket, leaving the top open for little hands and big treasures. I back-stitched at the top edges for extra security.
Picture
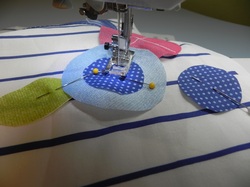
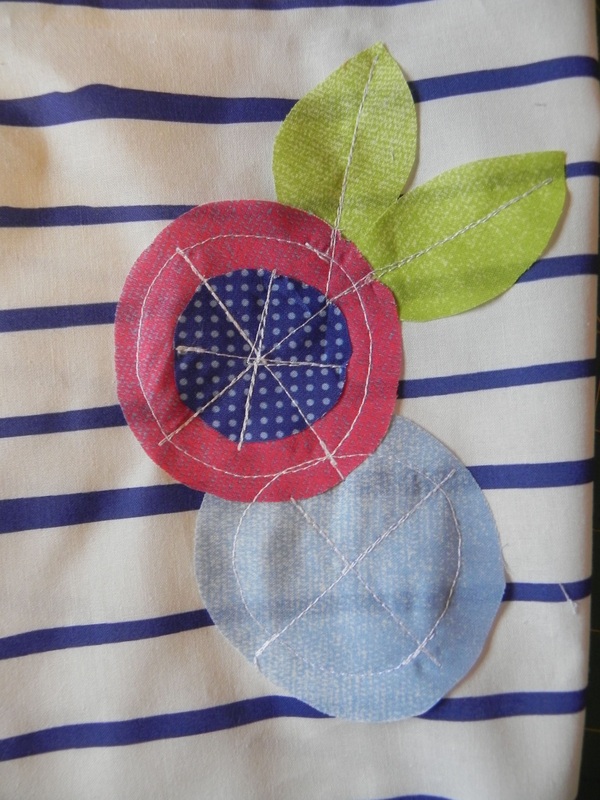
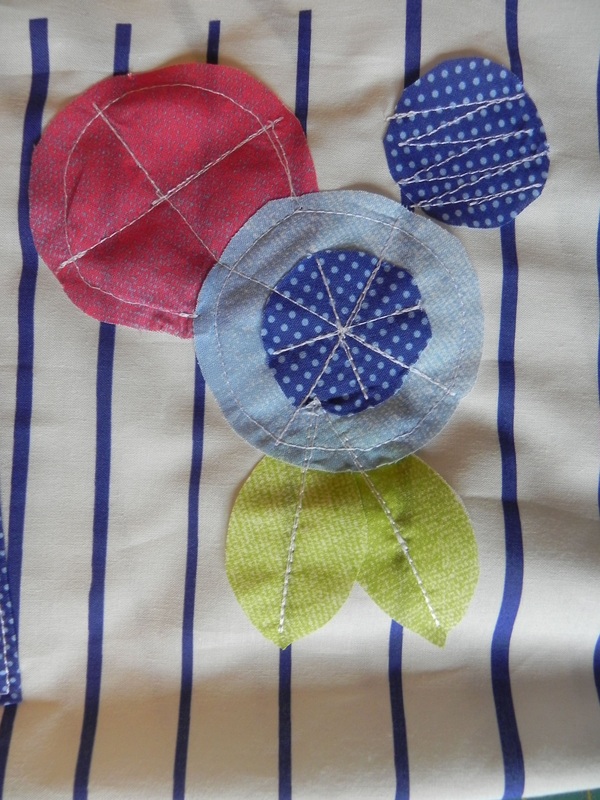
I didn't change any settings for the appliques, but you may want to do a zig-zag or use a free-motion sewing technique. I sewed a variety of straight lines and circles using my back stitch button and a tighter stitch to secure the ends. I expect the edges to fray, but I like that look. If you don't, consider using an applique paper, adhesive or if you are really saavy try turning under the edges and sewing your design by hand!
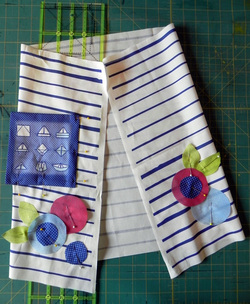
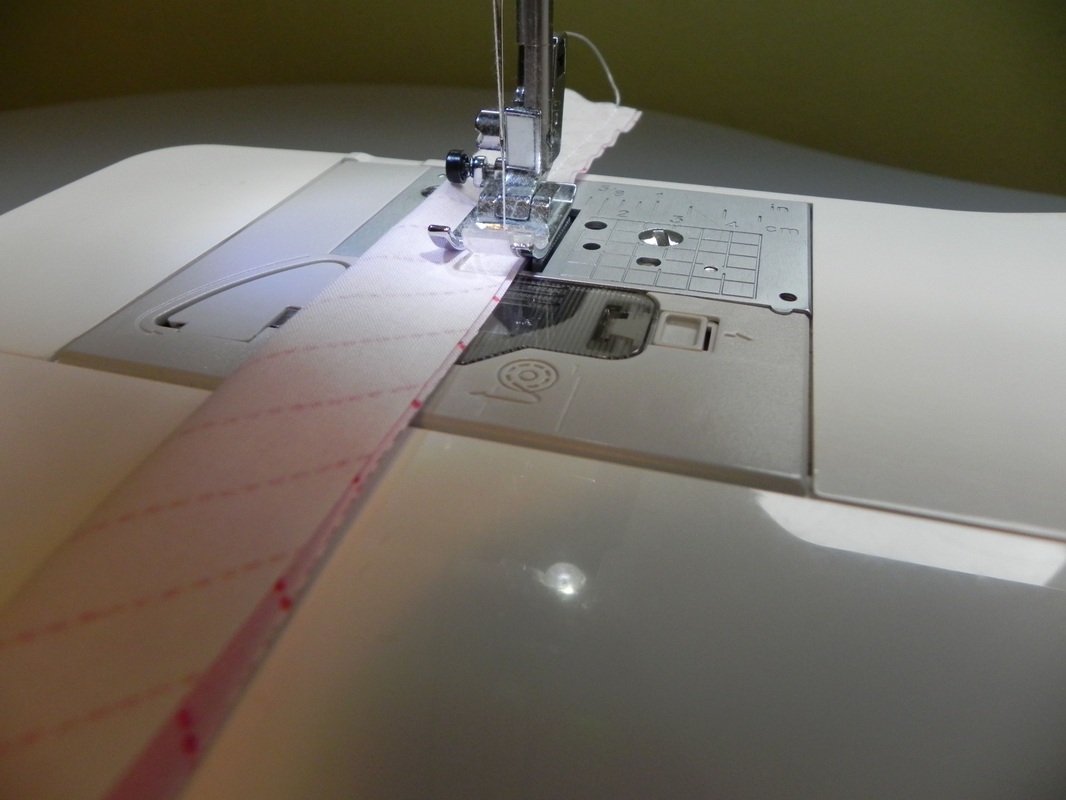
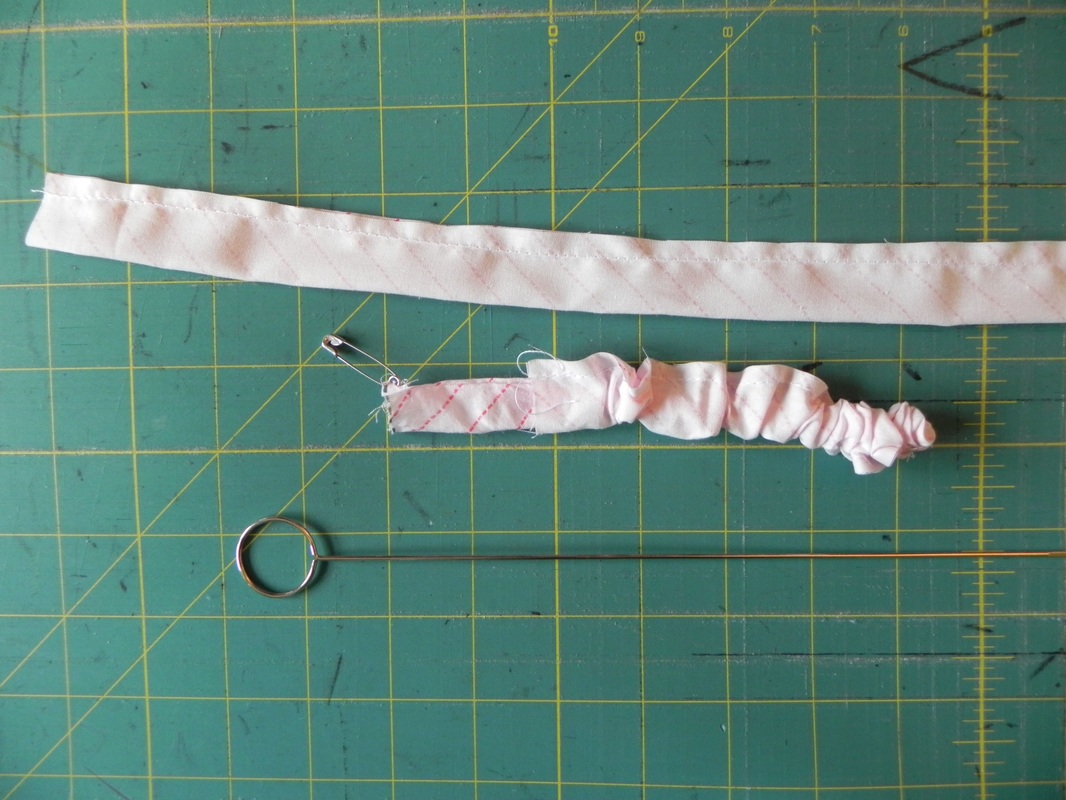
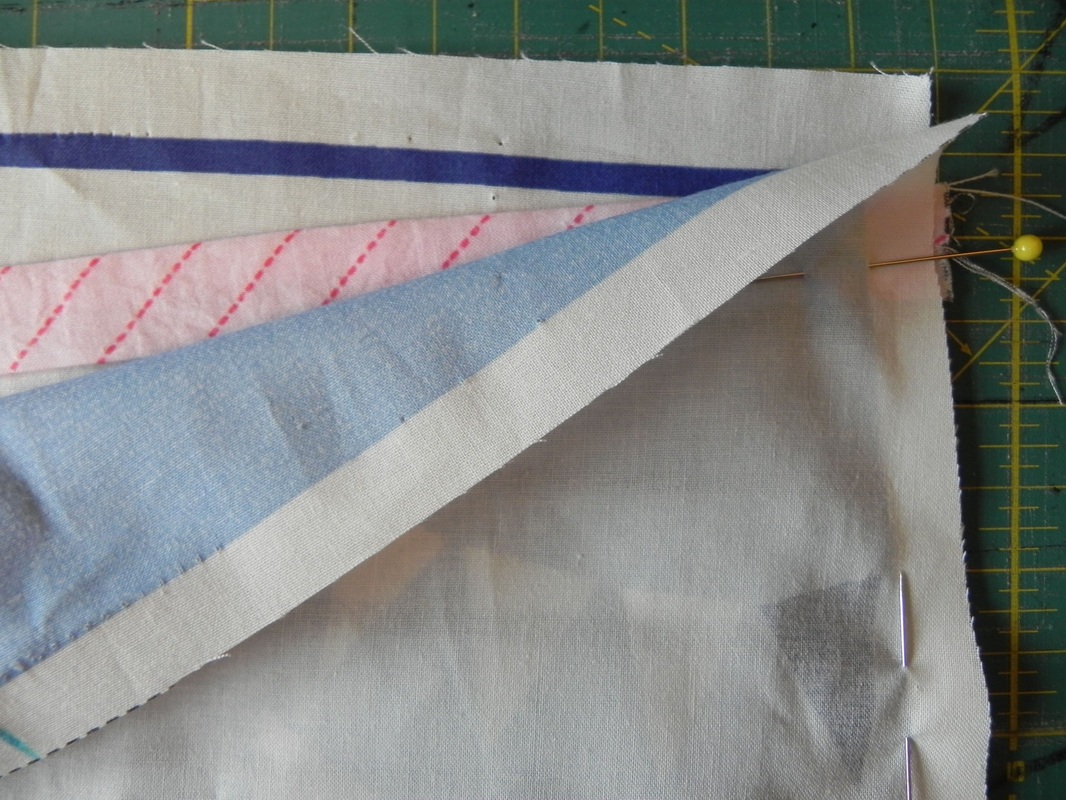
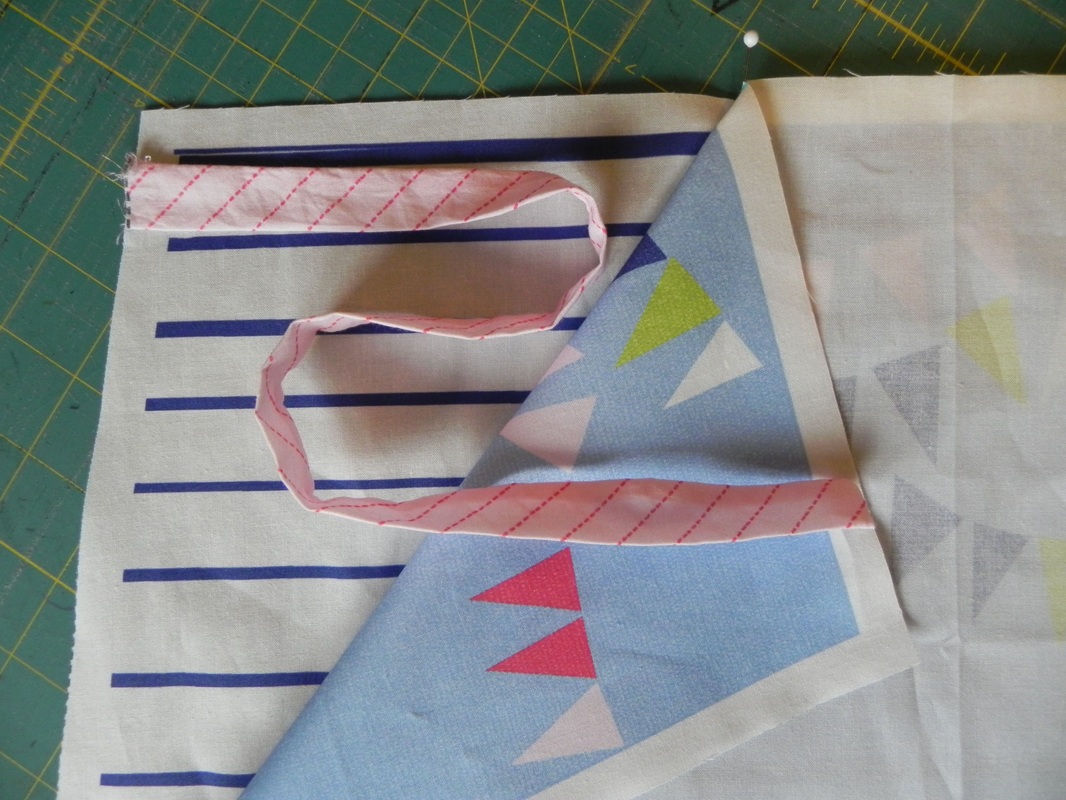
Here is how my appliques and pocket turned out. Next you will want to sew the ties. Fold them in half with right sides together and stitch 1/4" away from the edge. Turn and press. I used a safety pin to turn my ties, but you can also use a turning tool (pictured).
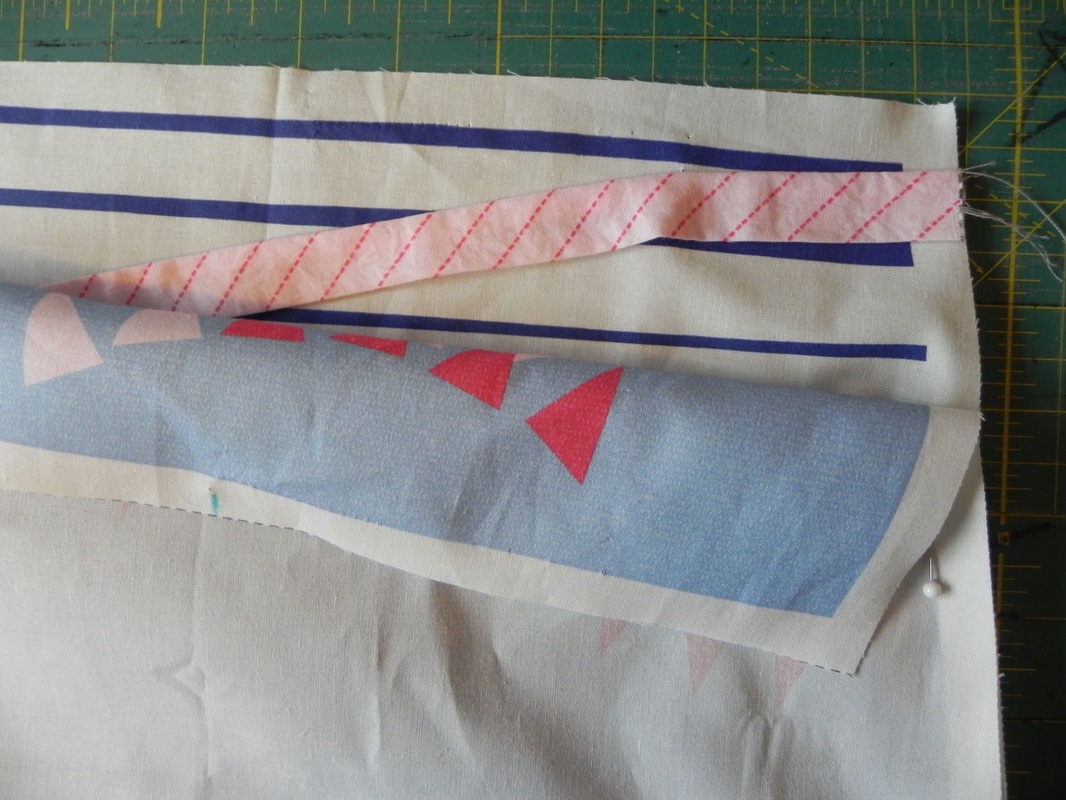
Now you are ready to put the skirt together. You will want to lay the skirt pieces right sides together and sandwich your tie between the two at both top corners. Make sure this is slightly below the stitch line so you will be able to turn the corner when you sew and not catch the ties.
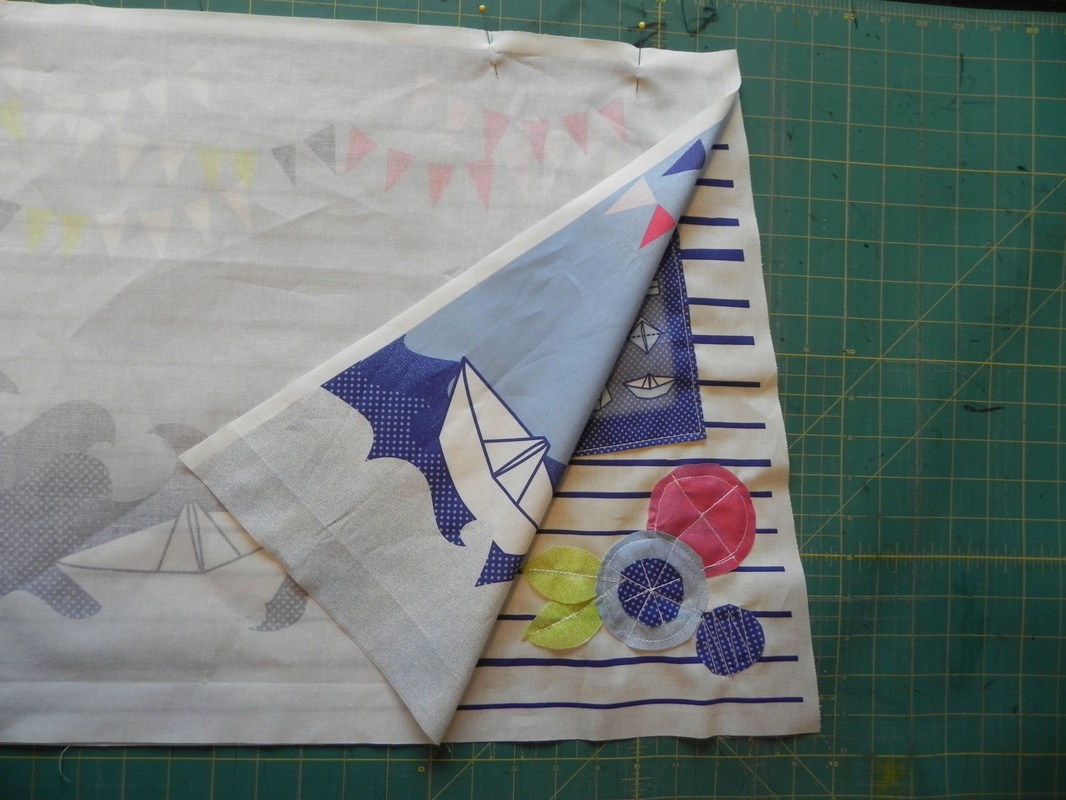
Pin the skirt from the hip mark at the top and down the side seam to the hem. Sew with 1/2" seam allowance. Clip the corners at the top before you turn the skirt right-side-out.
Turn the skirt to the right side and press.
Picture
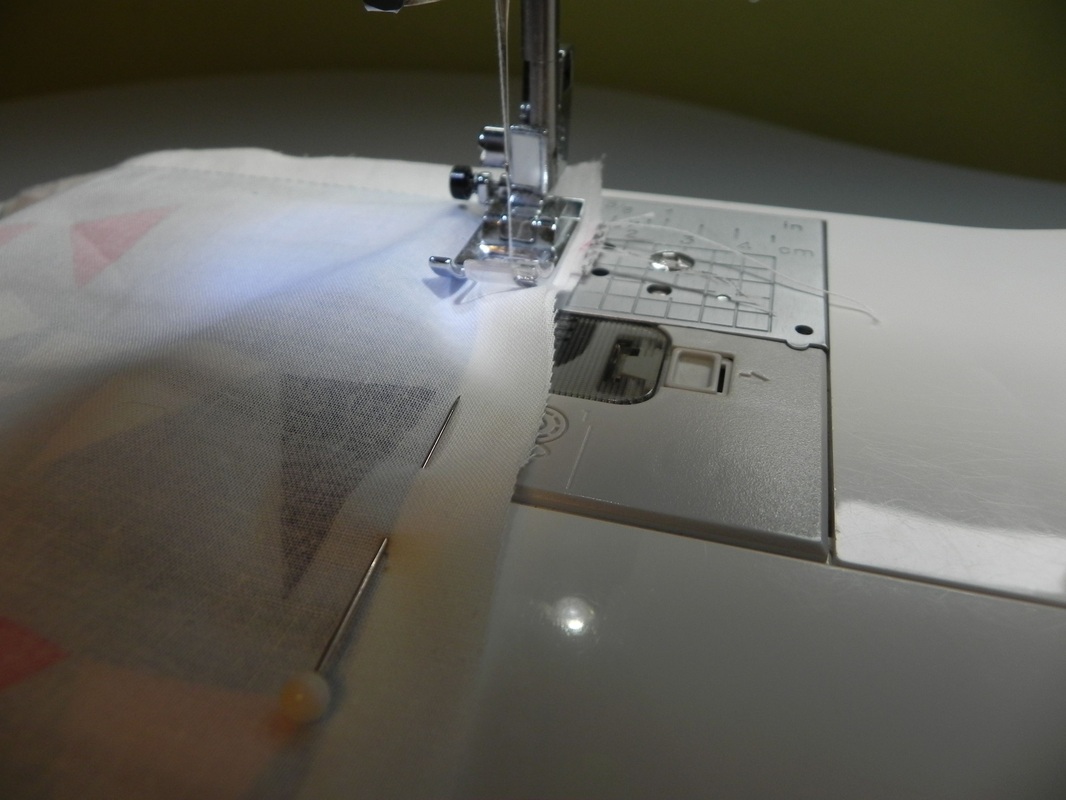
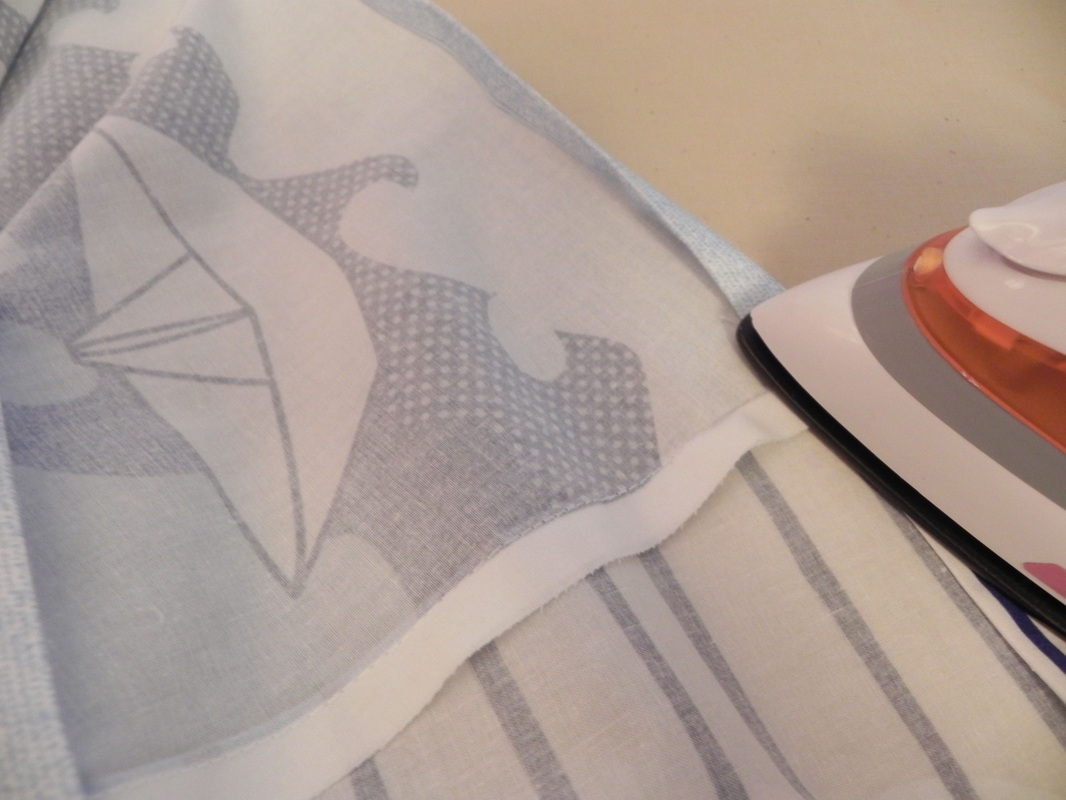
Next we are going to finish the hip opening. Turn and press this 1/2" toward the inside of the skirt. You can finish this with a zig-zag stitch at a 1/2" or turn it under 1/4" again and top stitch it. I turned and top stitched it.
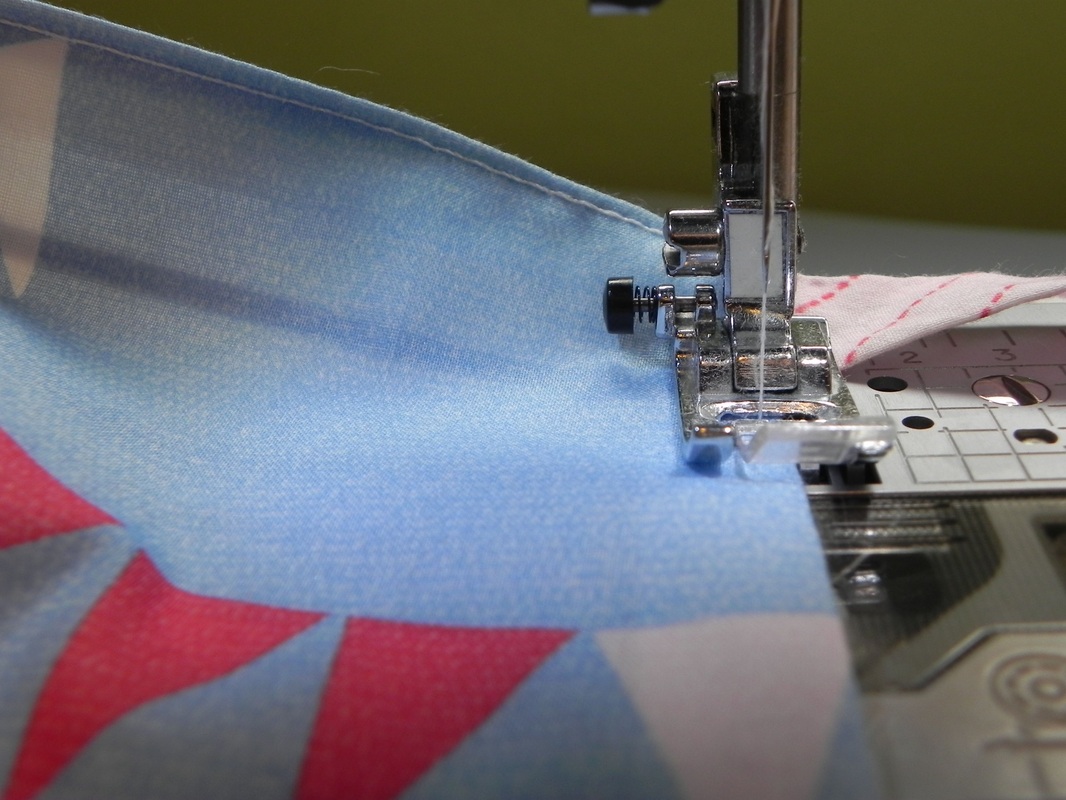
Determine the hem length. You may want to slip it on the child to do this or match it up to something they already have. The finished length before hemming is 16" and I turn the hem 1/4" and 1/2" and then top stitch and press.
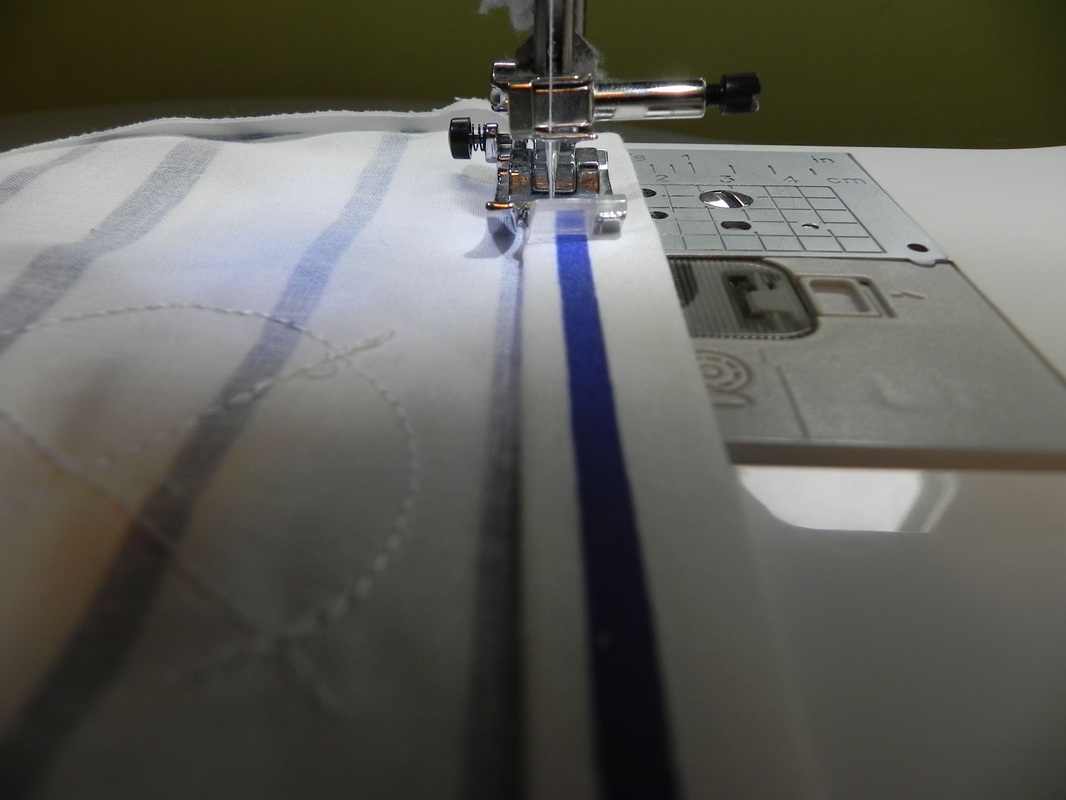
Almost there! Now you will top stitch close to the edge of the skirt from the hip openings down the side seam, stopping 4" from the bottom hem. Stopping short allows the skirt to hang a more easily and not curl back on itself.
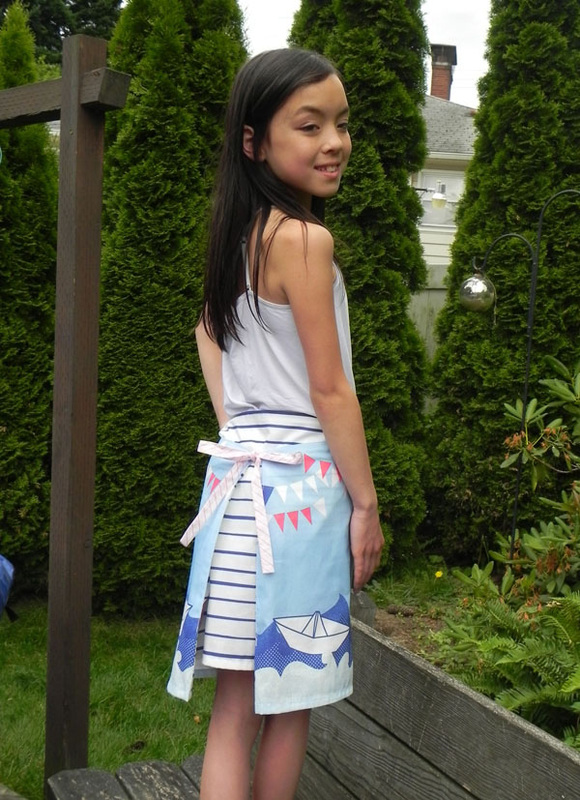
Land ho! Your skirt is ready to wear! One little note: if the skirt is too big in the waist mark where you want it to fit with pins, slip it back off and sew on a snap on each side at the waist band. Now your skirt is really ready!
A big thanks to our model Maggie S. for looking so cute in our skirt! Make sure to post photos of your finished projects over at Design Camp's Spoonflower page or on our Flickr site. I love seeing what you create!
 
We had an amazing week at camp last week! The youngest group of the summer made these terrific samplers. Each day they assembled a block, building skills and then they finished the quilt on the last day of class. I can't wait for camp again next week!

Spoonflower Kudos

6/23/2011

 
This past couple of months I've been designing fabrics to enter in the weekly Spoonflower fabric design contests. Thanks to everyone who has voted for me and 'liked' my designs. I have approved some of my strike-offs and have my designs for sale in the Design Camp Shop. Someone bought two yards of Moon Rabbit yesterday and I just about fell off my chair!

This past week two designers whose work I admire commented on my contest entry Puzzle Town. It was a wonderful feeling to receive their messages of encouragement and compliments, so I thought I'd return the good karma and share their work on my blog.

Picture
I voted for Drea Roman's designs in the recent Michael Miller/Spoonflower 'Project Selvage contest. Her seaside-inspired collection "If By Ocean" was one of the 10 finalists in the Baby Boy-themed contest.

You can buy her darling fabric designs, including Beach Block (pictured left) at her Spoonflower fabric shop Ttoz Fabric Designs

Picture
I've been a fan of Heather Dutton since her whimsical design 'Fleur de Cuillère' won the spoon-theme design contest (pictured left). She has a great sense of color and an impressive portfolio you can see on her website Hang Tight Studio. Browse through pics of her fabrics and projects on her Flickr Spoonflower page!
Heather's design 'Little Bugaboo' was a semi-finalist in the Project Selvage contest. Check out her cute wallets and tea towels for sale on Etsy!


I am happy to be in the company of such talented designers and sweet women. It has been fun to compete with an international design community. So far I have placed in the top 30% on a regular basis and I hope to make it to the top ten again one of these days. (Apple Pie Cutie placed 4th in the 18" Doll Outfit Contest!) I have a few designs I've been working on for up and coming contests, so keep your eyes peeled for more!
 
Come-on, sing it with me -- Spools out for-evuh! Yes indeed! I've been busy wrapping up projects and getting ready for Design Camp at the end of this month. I can hardly believe this will be our 5th summer of sewing here in puddletown. I can't wait! For fun I thought I'd post a little slide show of the projects I've worked on with the middle school students this year. Enjoy!

Quilting Cousins!

5/31/2011

 
I recently got in touch with two cousins of mine who quilt. It has been great to learn about their projects and chat with them about their quilting adventures. Here is a bit more about them and some photos of their quilts.

My cousin Jan Gessin lives in Sydney, Australia and is an expert on antique doll quilts. She sent me some amazing photos and historical information about her collection. You can see the quilts on her her website, OnlineQuilter. I was so inspired by some of the fabrics in her collection I had to invent a new project based on them. More on that soon...
Another cousin, Tamara Borok, is also a quilter. She has an impressive gallery of over 40 quilts she has made and projects in process. She teaches quilting in the San Francisco area and will be teaching traditional blocks such as the Carpenter's Square, Gordian Knot, Boxes of Splendor and a beginners quilting class soon.  Her quilt, Storm at Sea (pictured) was a 1st place winner in the San Francisco Quilt Show, 2011. Congrats Tamara!

I think we should start a family swap or block of the month club. It would be really fun!
 
What a treat! I got to visit the Textile Museum in D.C. last week while I was traveling on JDRF business. Those trips are usually very scheduled, but I flew in early and had a chance to explore before my first meeting. I did a quick internet search for quilts in D.C. and the link to the Textile Museum came up. I figured out the Metro route and headed over to explore.
In addition to a research library (which unfortunately wasn't open when I visited), there are two main exhibits. The first, titled simply 'Green: the Color and the Cause' had a mix of contemporary artists exploring those themes and historical pieces with explanations about how different cultures achieved the color green and what it represented. One of the contemporary artists who stood out to me was Maggy Rozycki Hiltner. I really enjoyed her piece, Hothouse Flowers, 2005 (pictured).
Picture
Hothouse Flowers by Maggy Rozycki Hiltner
Another artist I really liked was Justin Randolph Thompson. He built a palm tree using an old quilt top and other found objects. All the artists are on the Textile Museum website : You should explore it if you have time -- lots of great inspiration out there!

The second exhibit was 'Second Lives: the Age-old Art of Recycling Textiles.' I was fascinated to learn about many different historical and cultural approaches to 'up-cycling' textiles. There were some incredible pieces from India, Pakistan and Japan on display. In particular I was smitten with an Afgan quilt made from recycled clothing . I spent some time in their lovely garden as well. The museum in right in the middle of the Kalorama neighborhood just off Embassy Row.
 
I have quite a few projects this week that I am working on and wrapping up. I am working on two quilt designs, had a swap pillow to finish for guild next Thursday, I took another fun free class at Modern Domestic to test drive free-motion quilting their Bernina's  (yes, I want one and they have a great trade-in offer this month!) and I entered another design in the Spoonflower fabric of the week contest. Oh, did I mention I am working on an illustration project for Columbia Sportswear and sewing a costume for my daughter's play? Yah, lots going on!

The swap last month at PMQG was to sew a square using only solid fabrics (I blogged about mine here).  I picked a lovely square by the talented Jill from Made on Main St. that goes with a quilt she is making her son. She also won the monochromatic modern quilt contest recently. Here is the finished block I made into a pillow for her, my Spoonflower entry "Rainbow Sherbet" and a new quilt project I'm working on:

Don't forget to vote for your favorite ice cream fabric in the Spoonflower contest this week. I hope mine gets one of your votes! Thanks to all of you who voted for me in last week's contest. My design was #64 out of over 400 designs - I was happy to be in the top 100!
 
Finished up the last of the 3 part class last night at Modern Domestic. I really enjoyed this class and am really pleased with my first try at hand printing textiles. The design is inspired by a 1920s French wall paper design (originally is was three colors) which I've had illustrated for a while. It was a perfect design to learn this technique with. There were some tricky parts to get the repeat to line up correctly but I wanted to get that experience so I would build confidence to take on this kind of project on my own. I can't wait to do this again, but first, what should I make out of these fabrics? I just can't decide!